This is how to increase the Xbox One storage

With the revolution in recent years on the gaming world and the quality shift that made gaming graphics look like real in some games such as Uncharted, FIFA and Tom Clancy, it has become mandatory for developers and not an option to increase game sizes so you can view all of these Carefully designed details, which has certainly led to insufficient storage capacities on gaming platforms such as Xbox One and PlayStation 4.
In a separate article I previously provided you with how to add a new storage device to the PlayStation 4 platform and make it default in this article:
How to convert the external disk into default storage on PlayStation 4
Now it’s the biggest competitor to the PlayStation platform, which is made by the software giant Microsoft.
Initially, it was a little cheaper to replace the disc on the Xbox 360 with a larger disk, and it was still there until the Xbox 360 E, and then it was removed from the Xbox One and later versions of Xbox One S and Xbox One X.
This problem has become more pronounced in recent versions of the Xbox platform, called the Xbox One, and more specifically the Xbox One X, launched by the company for the purpose of displaying games in 4K resolution and with enormous specifications, which is the largest yet to rival the most powerful personal computers for games. One of the exclusive games released on the device, the Quantum Break, simply takes 178GB of storage capacity of the platform.
If a single game takes up to 178GB, while the device has 500 GB, 1 TB and 2 TB, it will not exceed 15 games and you will have to quit some of the games that you have finished so you can try more, and of course without talking about anything else that can be downloaded on the platform of applications and other means that even the capacity of 2 terabytes will not be enough for the amount of detail that the version of Xbox One X can display and lead to increase the sizes of games terribly.
Fortunately, there is a solution to this, Microsoft did not leave us idle in these imaginary sizes because this may harm the market certainly we will be lazy or it will be difficult for us to remove one of the games that’s close to us, which we may return to one day we change our decision and do not buy new games, we have, or we are going to buy CDs, which is not favored by some of the reasons I mentioned earlier in a special article is:
Which is better, to buy Physical Games CDs, or to buy it Digitally?
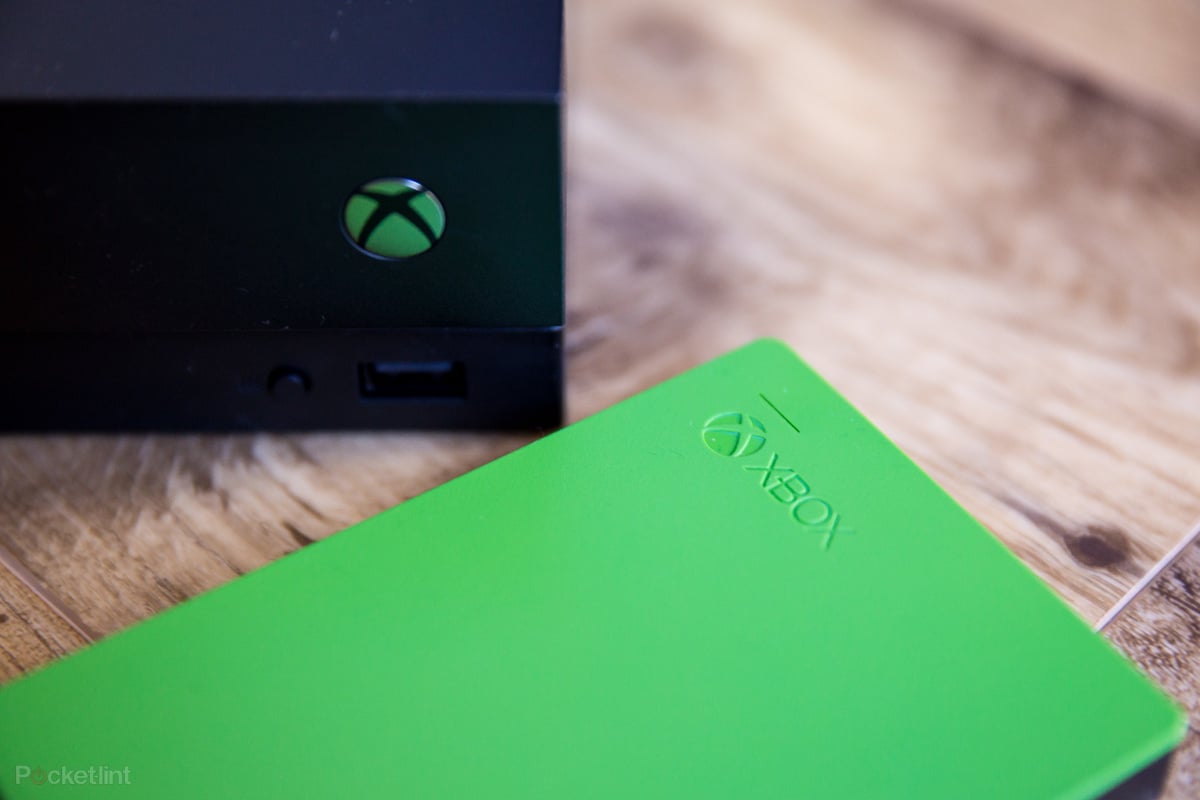
The alternative solution is more simple than its predecessor and not so much of a cost. All you need is a new external hard drive with a USB 3.0 connection to connect the new disk to the device without having to go to the technician who might open the device and replace the disc with it as it was previously with Xbox 360 versions.
Not only that, but you can get better and faster performance than your internal drive if you get a 7200 RPM hard drive – talk here about the Xbox One S-platform.
After you get the external disk with the proper storage space you will only need to take some simple steps to make it work on the Xbox One platform, as well as a step you do if you want to make it your default disk to download games and applications directly to it instead of the internal disk that may Is full.
Here is my role in defining the steps required to make this disk default for games and applications or to make it default for music, pictures and videos, follow the following lines.
Install external storage on Xbox One
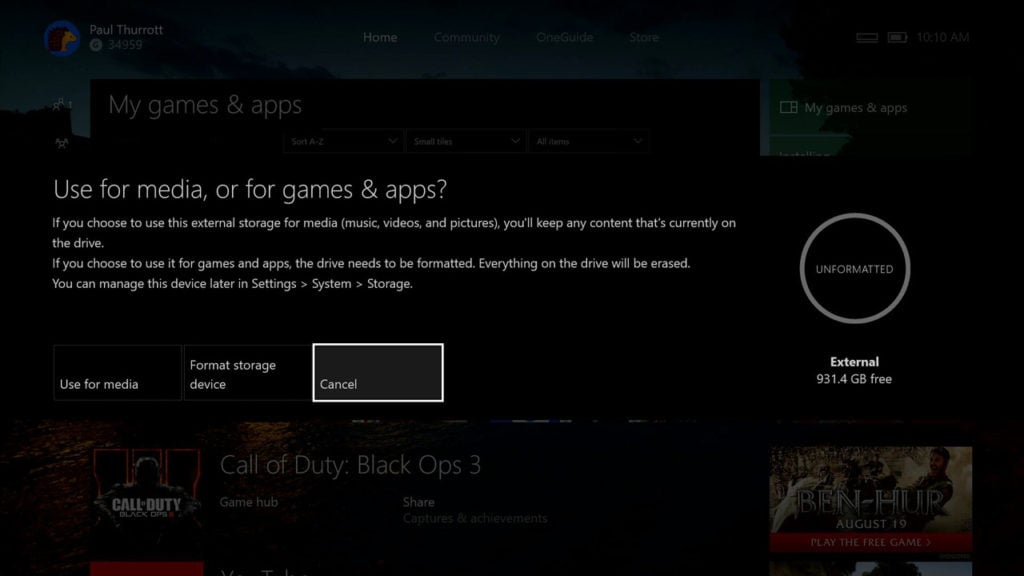

The second option is Format Storage Device. It removes all the files and data on the disk and configures it to work on the Xbox One platform and is able to receive game files and applications for the device as well as make it a default storage disk. In explaining this we are of course focusing on the gaming problem so choose Format Storage Device.
Attention: You must take a backup of the files on the disk because they cannot be restored in normal ways if it is configured by the device.

- View content: An option that allows you to view multimedia, games, and applications on this disc.
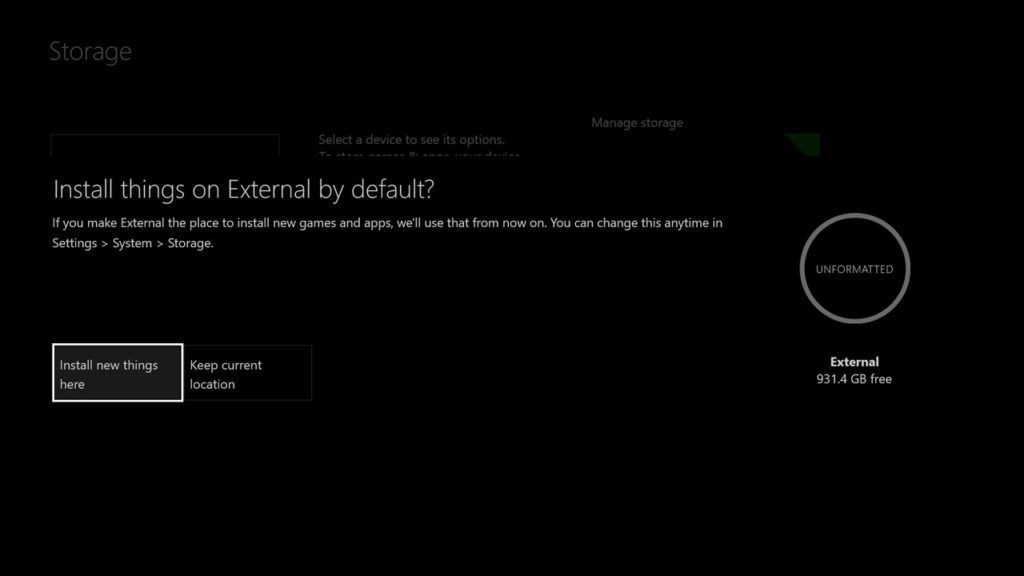
- Install here by default: It is an option to install games and applications on the external disk by default if you did not select this in the previous steps when you first set up the disc.
- Rename: The default name for the new external disk is External, you can rename it with this option.
- Format: You can format the disk again if you want to delete everything on it through this option.
Move the games to the external disk in Xbox One
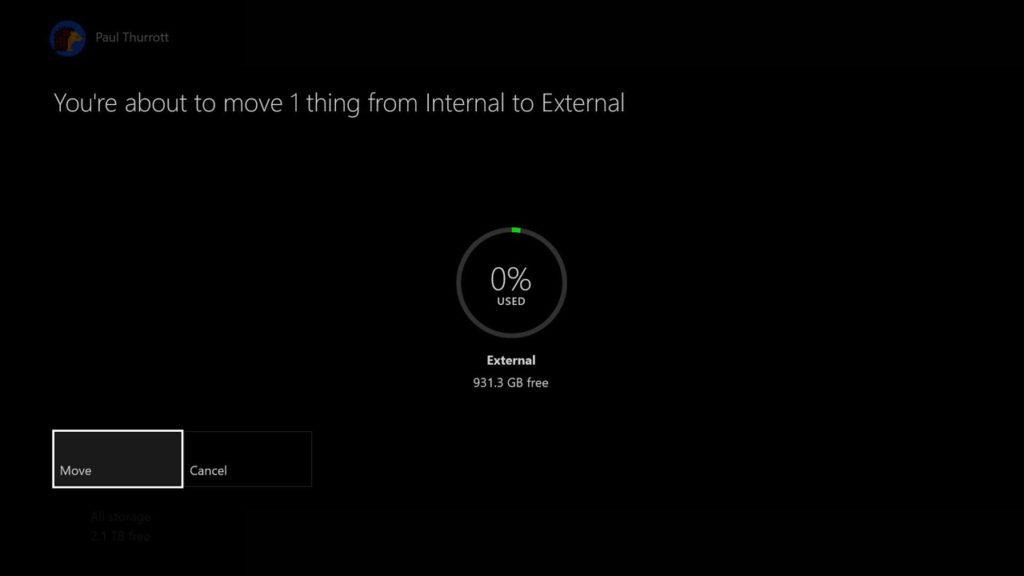
Microsoft has given several other options for the new USB 3.0-installed external disk, which can transfer pre-installed games on the internal disk to increase the available internal disk capacity if you want to continue to make it a default disk and location to download games and applications always or if you want to transfer Files of one of the games to another Xbox One platform with your friends.
Note: Even when you transfer game files from one device to another, you can not play them on other devices before you buy them with the accounts on these devices or sign in with your own account data.
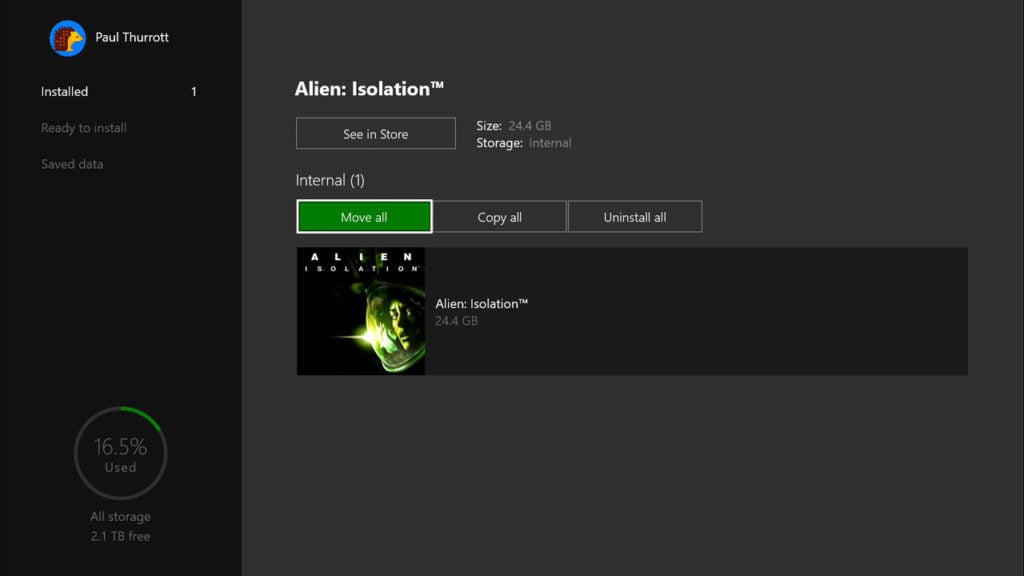
So; In order to transfer these games and applications you have to go to My Games & Apps, and then you will have a choice for a new classification in terms of the stored disk, Internal and External.
Select the game or games you wish to transfer to the new storage disc and then press the Menu button on the joystick, and when the options appear, press Manage Game.
To transfer games from external storage to internal storage, follow the same steps.
I have reached the end of the article and the second series of articles on the storage
capacities of the PlayStation 4 and Xbox One platforms that explain how to install external storage capacities and make them the default and first option when downloading games and applications with how to transfer files and games to and from them.
Be prepared to wait for more detailed explanations on your site Samma3a Tech, and do not forget to share your comments, information and experiences in the comments section below.